Some departments may be required to use encrypted network drives for their files. These drives are unique in that they must be unlocked before they can be used. This is called “mounting” the drive. The following steps explain the process on how to use these secured network drives.
Mounting The Drive
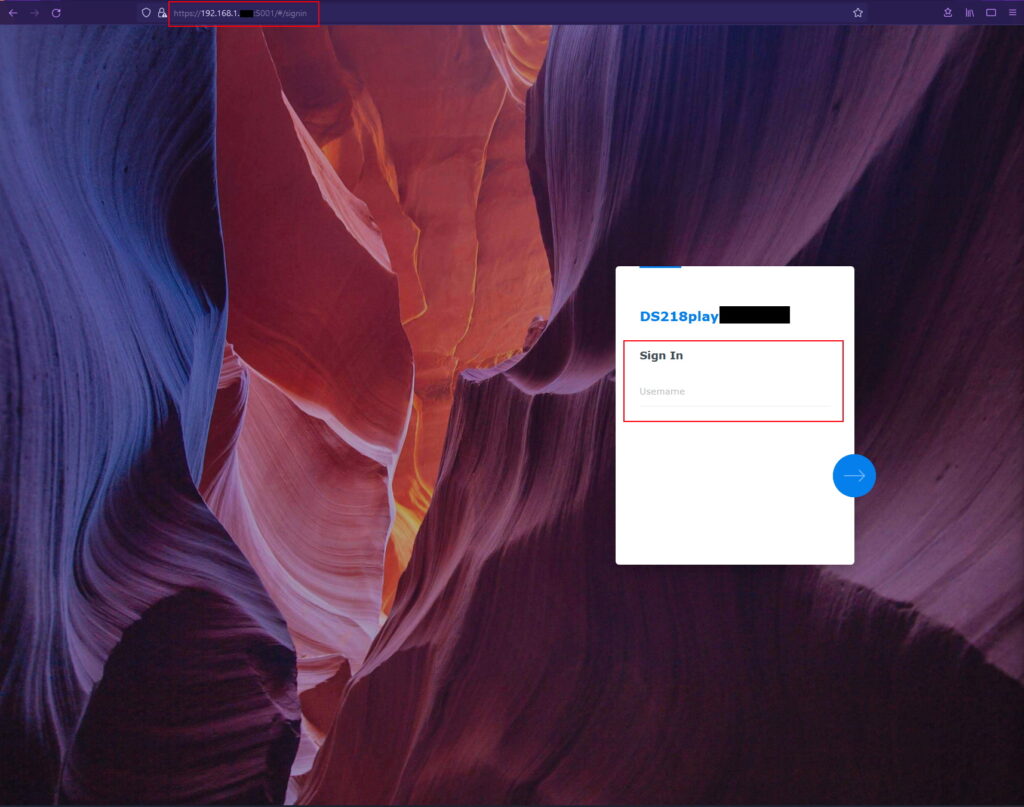
The first step is to log into the NAS. This is typically done by going to the IP of the device, something similar to https://192.168.1.###. You’ll see a login screen similar to the one below.
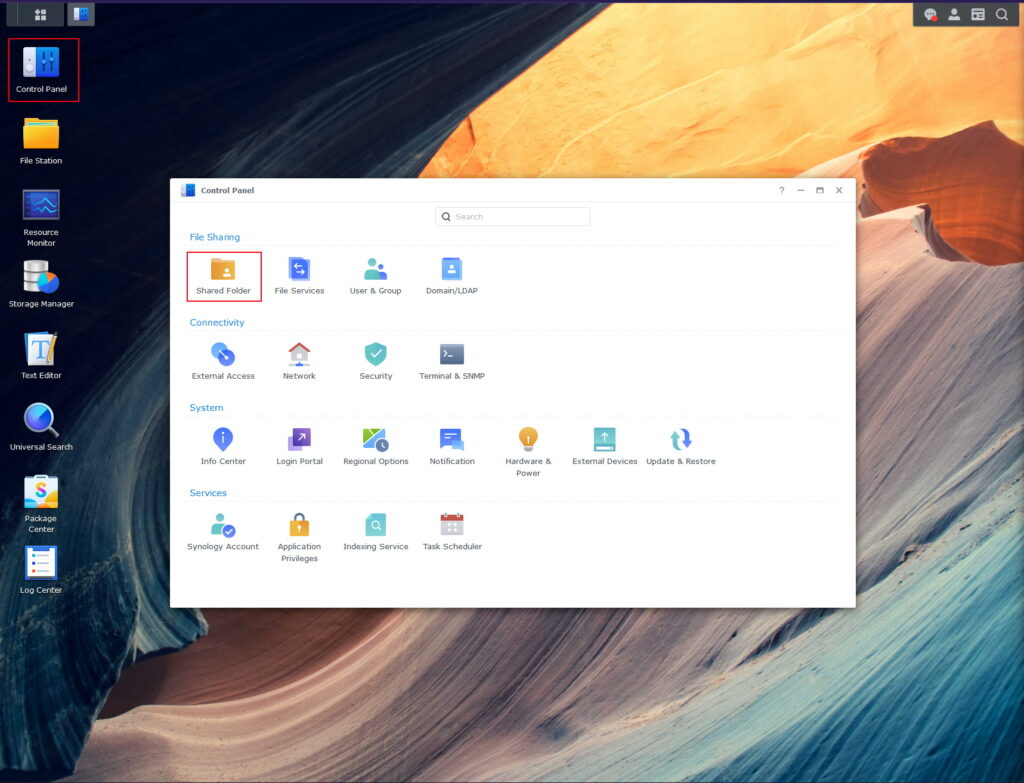
Once you have logged in, you’ll want to navigate to the drives themselves. Click on the Control Panel icon in the top left of the dashboard. Then click on the Shared Folder icon in the modal window.
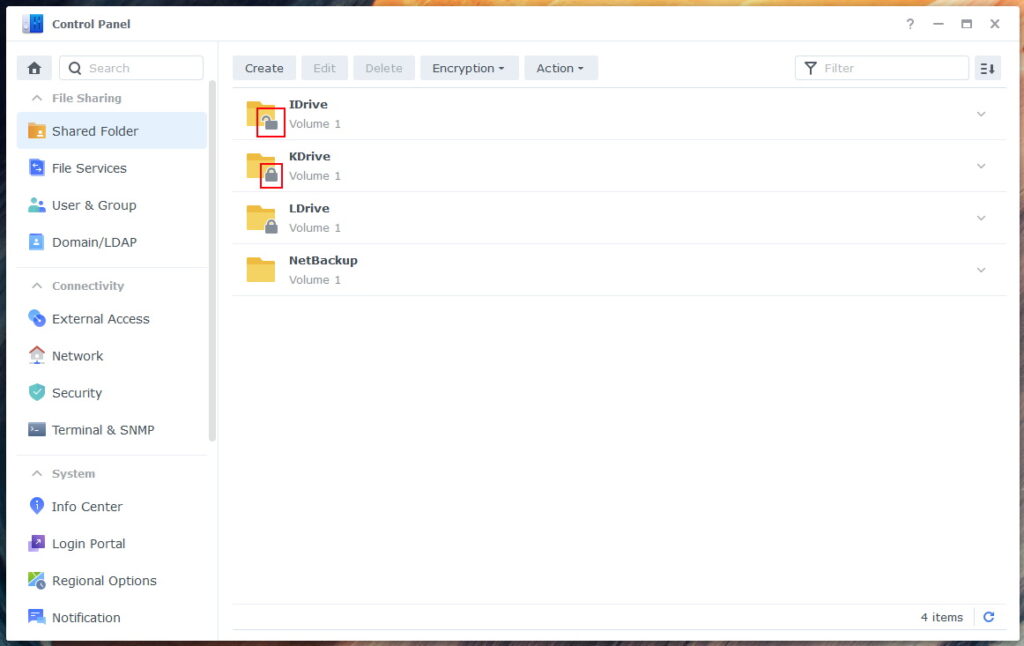
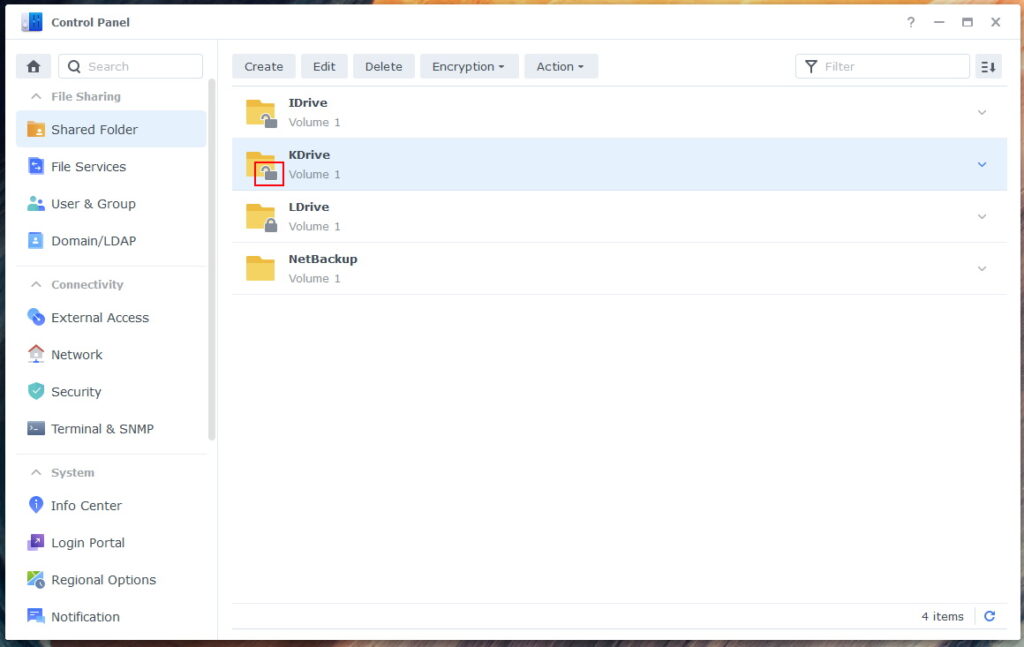
You’ll now see a list of drives that are available. Encrypted drives will have a lock icon. An unlocked icon indicates that the drive is already unlocked and mounted. A locked icon indicates that it is unmounted and locked.
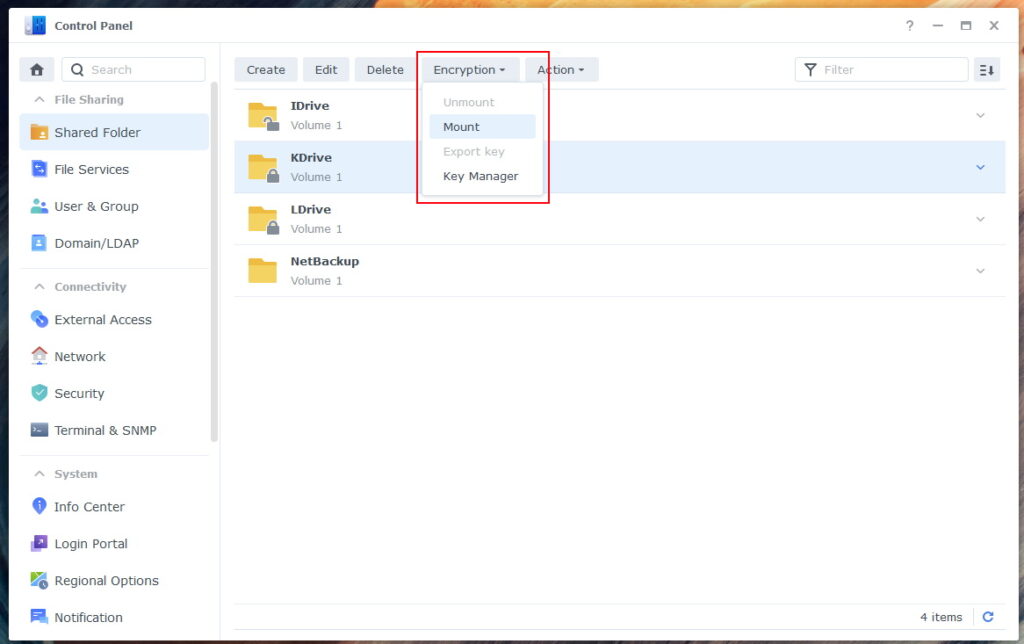
Select the drive you would like to mount, then in the Encryption dropdown, select Mount.
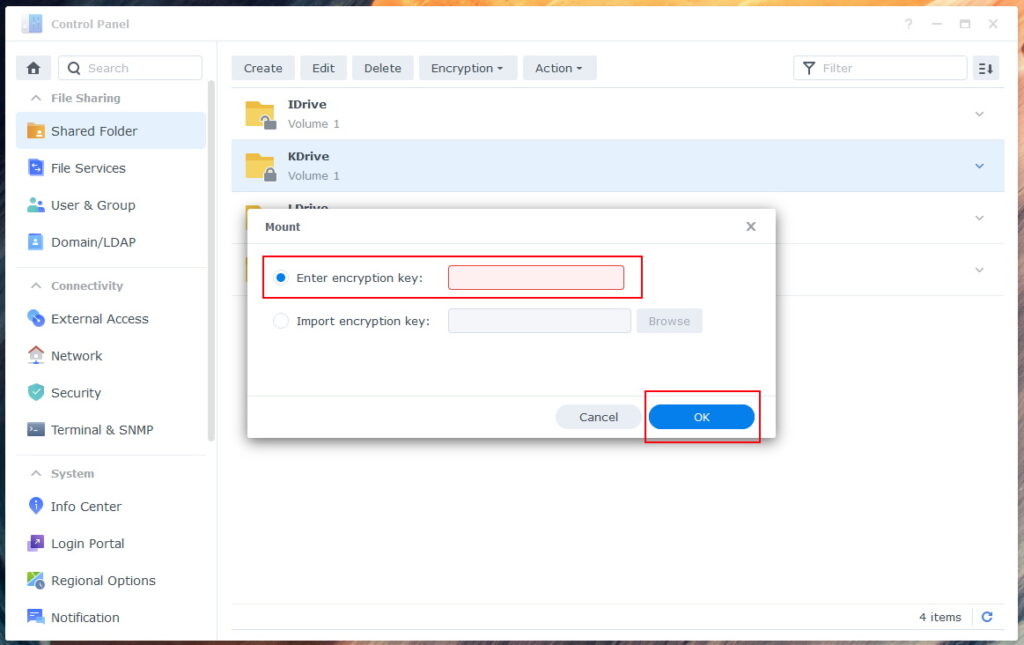
It will then have a popup asking for the password in order to decrypt the drive and mount it. Enter the password at this time and click on OK.
Once successful, the icon will change to an unlocked icon. You will now be able to access the drive from your computer shortcuts as necessary.
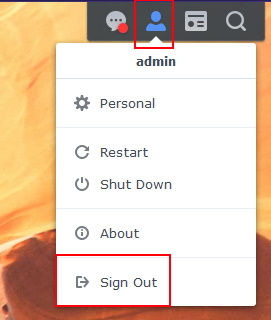
Once you are done with the NAS, log out by going to the top right person icon and selecting Sign Out.
Unmounting The Drive
To close and unmount an encrypted drive is simple and very close to the reverse as mounting one. The first step is to log into the NAS. This is typically done by going to the IP of the device, something similar to https://192.168.1.###. You’ll see a login screen similar to the one below.

Once you have logged in, you’ll want to navigate to the drives themselves. Click on the Control Panel icon in the top left of the dashboard. Then click on the Shared Folder icon in the modal window.

You’ll now see a list of drives that are available. Encrypted drives will have a lock icon. An unlocked icon indicates that the drive is already unlocked and mounted. A locked icon indicates that it is unmounted and locked.
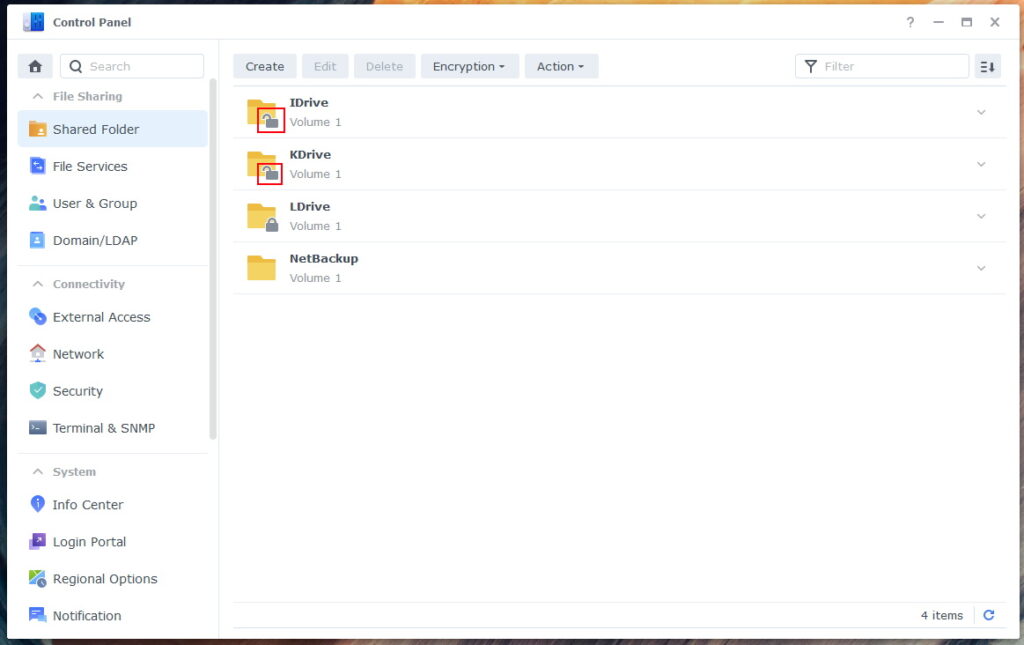
Select the drive you would like to unmount, then in the Encryption dropdown, select Unmount.
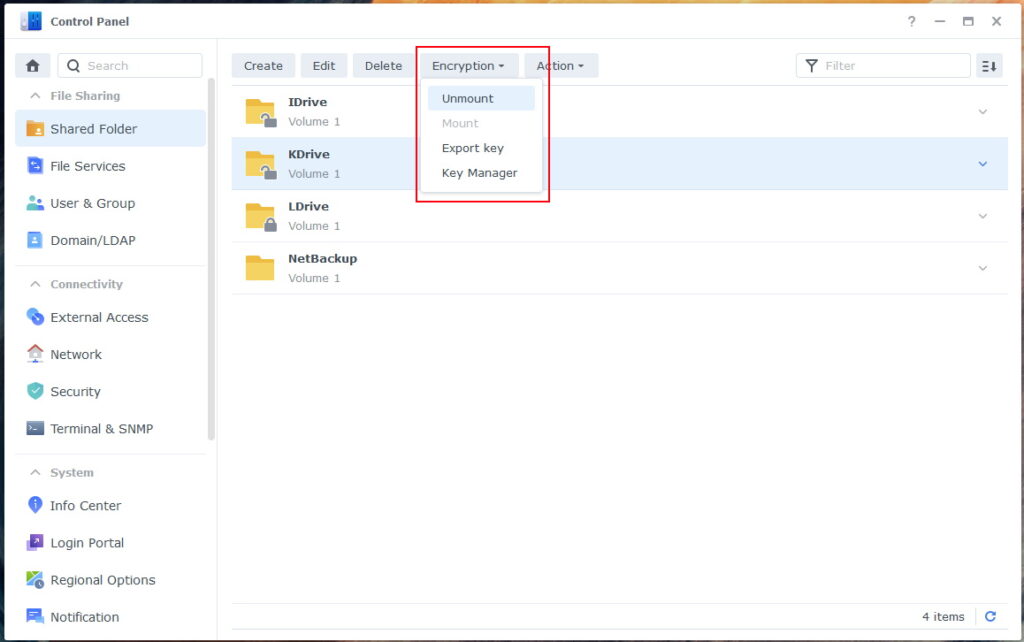
You’ll get a confirmation pop-up, click on Yes.
NOTE: Anyone using the drive at this time will be disconnected and any unsaved changes will be lost.
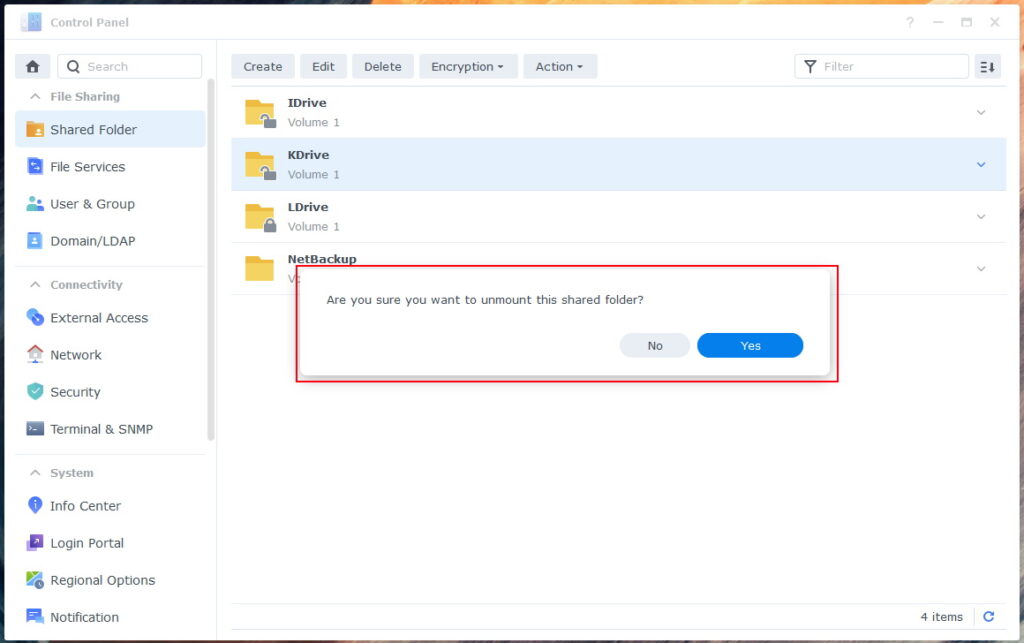
It will take a little bit of time to unmount. Once you are done with the NAS, log out by going to the top right person icon and selecting Sign Out.

