Contents
iMIS GL Export / Import
After migrating from iMIS to iMIS EMS, there are some changes on how financial data is transferred to Sage. There are a few types of transactions that are migrated and two different ways of handling them.
Auto-Batches
Auto-batches are batches that are automatically created by iMIS for anyone making a purchase through the website. So this is almost always online credit card purchases. These have a special procedure to process them in order to maintain the separation of different business entities in iMIS over to Sage (such as BMC, SEC, PSAB).
- Log into iMIS https://myaccount.boroughs.org/staff
- Go to PSAB → Custom IQA → Finance → PSAB GL Export and run the IQA.
- Click Find to have it display results.
- Click on the Export drop-down in the upper right, and select CSV.
Note: This will export all the recent batches, not necessarily any specific batch.
- Save the file as
imis-export.csv- If your browser doesn’t ask you where to save the file (and automatically saves it), just open the file and File → Save As. Then, in the
N:\IMIS GL\folder, rename the file toimis-export.csv(see below). Then click Save.
Note: If the file already exists and it asks you to replace the file, click Yes.
- If the browser asks where to save the file, save it to
N:\IMIS GL\asimis-export.csv(see below). Then click Save.
Note: If the file already exists and it asks you to replace the file, click Yes.
- If your browser doesn’t ask you where to save the file (and automatically saves it), just open the file and File → Save As. Then, in the
- Next we’ll open the converter. In Windows, navigate to
N:\IMIS GL\ and open theiMIS GL to Sage vX.0.accdbAccess file. - Once open, it should ask you to enter a batch number. Enter the iMIS batch number you want to convert. The batch number you use is the one iMIS assigned it, not what you want to call it
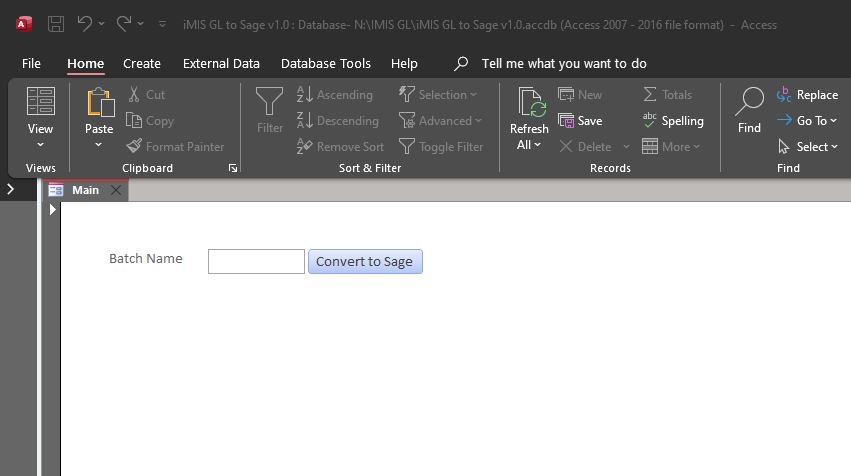
- Click on Convert to Sage, it will process the data and give you an All Done message when it’s finished. This will generate a file in the same folder
N:\IMIS GL\calledab-export.csv.
- In Windows again, navigate to
N:\IMIS GL\and click on Refresh to make sure you see theab-export.csvfile.
- Rename
ab-export.csvtoAB######-#.csv(or whatever you want the batch to be called). - Go to Sage and import the batch as you normally would.
Invoice / Deferred / Deposit Batches
These are basically any other batch type other than an auto-batch. For these, it’s much simpler as iMIS does take into account splitting the batch data by business entity.
Configure iMIS
The first step is only done once and has already been done, but noting here for future reference.
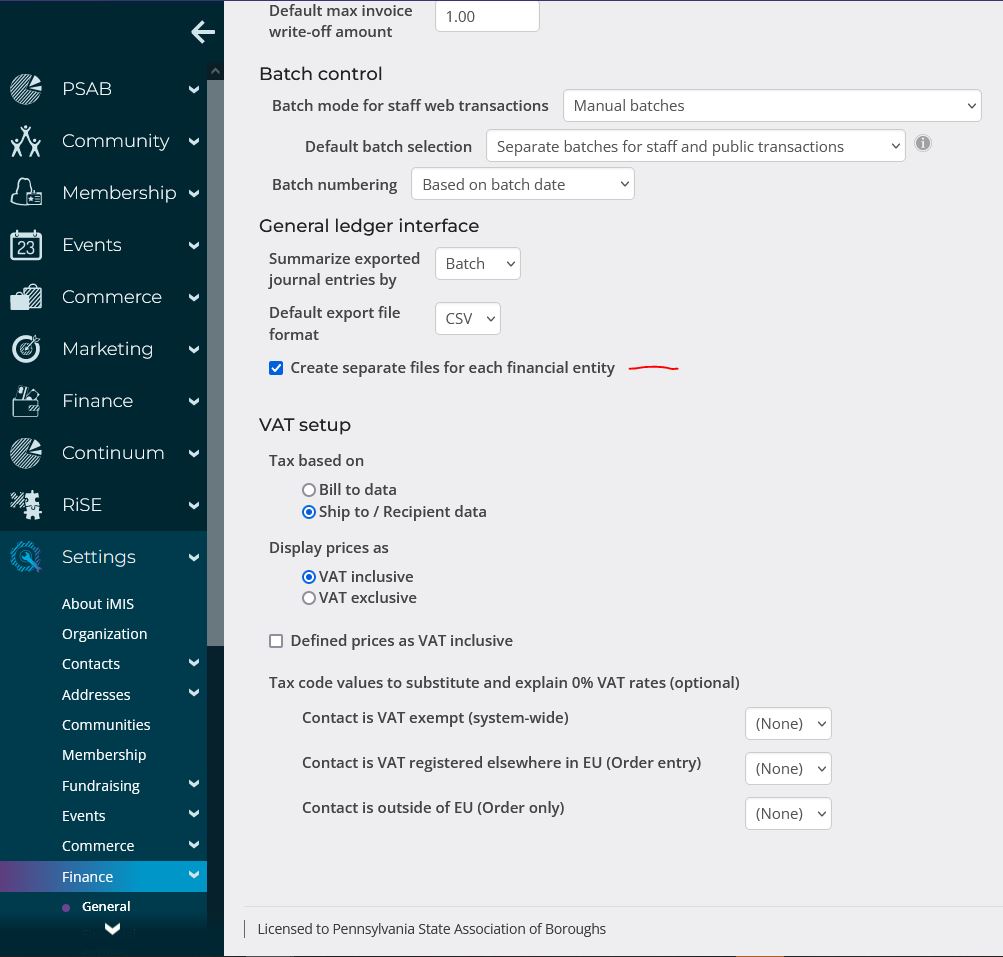
- Log into iMIS https://myaccount.boroughs.org/staff
- Navigate to Settings → Finance
- Scroll to the bottom and check Create separate files for each financial entity
- Click Save
Export the GL
iMIS has a native feature to export the GL data. From there, you will just export the batch data for import into Sage.
- Log into iMIS
- Navigate to Finance → Batches
- Select the batch you would like to work with by checking the box on the left of the row of the corresponding batch. The status is on the right and most likely says Open.

- At the bottom, click on Set Status, and select the appropriate status. If you are preparing to close it, select Ready.
- Once you are ready to close the batch, select the batch again and this time click on Post Selected.
- Next navigate to Finance -> Closing procedures -> General ledger export
- Enter the Begin date of the batch and the End date of the batch. Then click on Create Export File. This may take a few seconds so be patient.
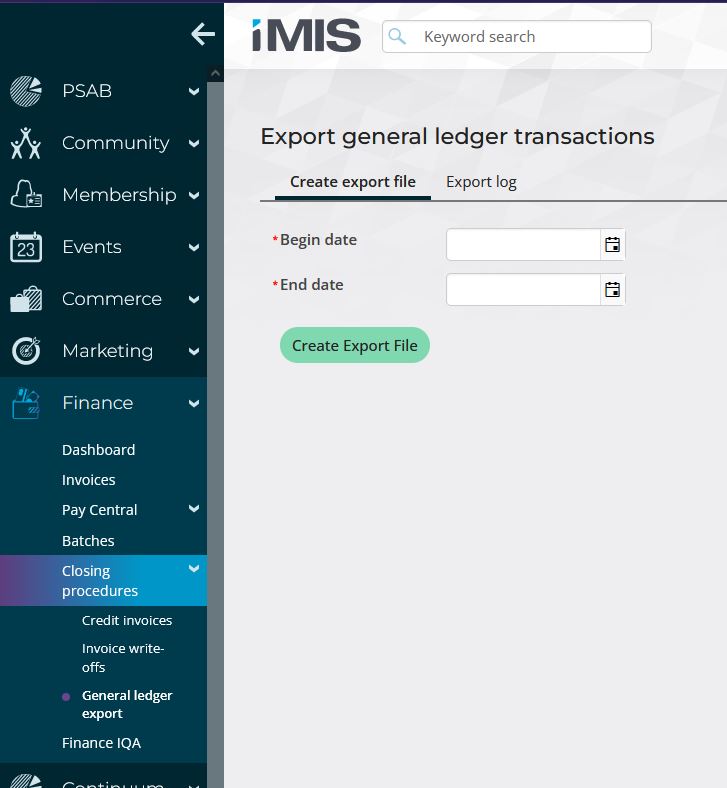
- Your browser will download a Zip file containing a CSV for each of the financial entities. Save this Zip to
N:\IMIS GL. You can later extract and rename the CSV files according to financial entity if you’d like.
Note: For deposits, be sure to remove the main deposit line **** Jenny help me word this better *** - Once you have prepared the CSV files, go ahead and import them into Sage.